Following the humiliation of the English during the Weardale Campaign the young King of England, Edward III was forced to sign the treaty of Edinburgh – Northampton in 1328. The terms of the treaty were, that in exchange for £100,000 the English crown would recognise that the Kingdom of Scotland was fully independent, that Robert the Bruce and his successors were the rightful rulers of Scotland and that the border of Scotland should be maintained as agreed in the Treaty of York signed between Alexander II of Scotland and Henry III of England in 1237. The First War of Scottish Independence was over, seemingly with Scotland’s aspirations realised.
This did nothing for the young English King’s popularity, which was already laid low due to the malign influence of his mother, Isabella, the “She Wolf of France” and her lover Roger Mortimer. The treaty was widely referred to in England as the turpis pax or “coward’s peace” and Edward was perceived as weak and ineffectual. Tensions grew as Edward reached his majority, married and had his first son. By 1330 Edward had had enough. He now needed to exert his own influence and power. With a band of trusted men, he surprised Mortimer at Nottingham Castle, arrested him and sentenced him to death. He was more lenient with his mother, forcing her in to comfortable “retirement”. It was from this moment that Edward III’s personal rule began.
A year before Mortimer was executed, in 1329, the Scottish independence movement was dealt a serious blow when the indomitable Robert the Bruce died at the age of 54. He was succeeded by his son, David II, who was only five years old. As had been shown in the past and recently in England a minority reign was a dangerous time. It was decided by the Bruce, on his death bed, that during his minority Scotland should be governed in his name by his nephew, Sir Thomas Randolph, 1st Earl of Moray. His stewardship did not last long and three years later on 20th July 1332 Thomas died whilst mustering troops to counter an incursion by Edward Balliol and his supporters. Some thought he had been poisoned by the English, but it is more likely that a kidney stone was the killer. The stewardship of the Scottish throne passed to Domhanall II, Earl of Mar after being elected by the Scottish nobles on 2nd August 1332.

The aforementioned incursion of Edward Balliol in the summer of 1332 requires further elaboration. Balliol, the son of King John I of Scotland (1292 – 1296), had been captured by the English following his father’s resignation of the throne in 1296. He was initially held in the Tower of London, then in 1299 was handed over to his grandfather, John de Warenne, 6th Earl of Surrey.
Following the death of Robert the Bruce, and the precarious state of the minority rule in Scotland, a number of Scottish nobles who had not sworn fealty to the Bruce following his victory at the Battle of Bannockburn sort to back Baliol in a plot to take the throne. Living in exile these nobles, “the Disinherited”, made plans for the invasion of Scotland with English troops. Edward III was aware of this scheming and although, in accordance with the terms of the Treaty of Northampton, he outwardly proclaimed that anyone plotting to break the peace would be arrested, but he tacitly supported the venture behind closed doors. Whilst he could not condone an incursion of English forces crossing the border he could and did turn a blind eye to an English force departing by sea from ports in Yorkshire.
Dupplin Moor Campaign
Under the command of Balliol and Henry Beaumont, Earl of Buchanan the Disinherited mustered a small force of some 1,500 men of which around two thirds were longbowmen and made sail for the Fife coast on 31st July. As mentioned previously, the Scots were well aware of this plot and the Earl of Moray had died on his way to counter the threat. His successor the Earl of Mar took up the mantle and mustered a large body of men to meet Balliol’s landing. The invasion force landed near Kinghorn in Fife on 6th August 1332. They were confronted soon after and a skirmish ensued as they disembarked. In a prelude to many battles to come the small contingent of English longbowmen, who had gotten ashore first, drove off the attack by the superior numbers of Scots. The Brut Chronicle describes that the retreat was “full of shame” due to the Scots retreat before a smaller force. Mar drew back to Perth and rallied the survivors whilst Balliol marched on Dunfermline.
Heading north, the Disinherited reached the River Earn (2 miles to the south of Perth) where the reconstituted Scottish army were waiting for them at Dupplin Moor. Outnumbering Balliol’s force by as much as ten to one the Scots had broken the only bridge over the Earn and waited on the opposite bank. So sure, of their impending victory, the Scots spent the night feasting and making merry in to the small hours. They had forgotten The Bruce’s sage advice that the Scots should never face the English in open battle. The following morning, although disheartened at the size of the enemy host, Balliol’s army prepared to attack. As they moved forward the Scottish army began to advance in two huge schiltron’s, one commanded by Mar and the other by Robert the Bruce’s illegitimate son, the Lord of Liddesdale, also named Robert Bruce.
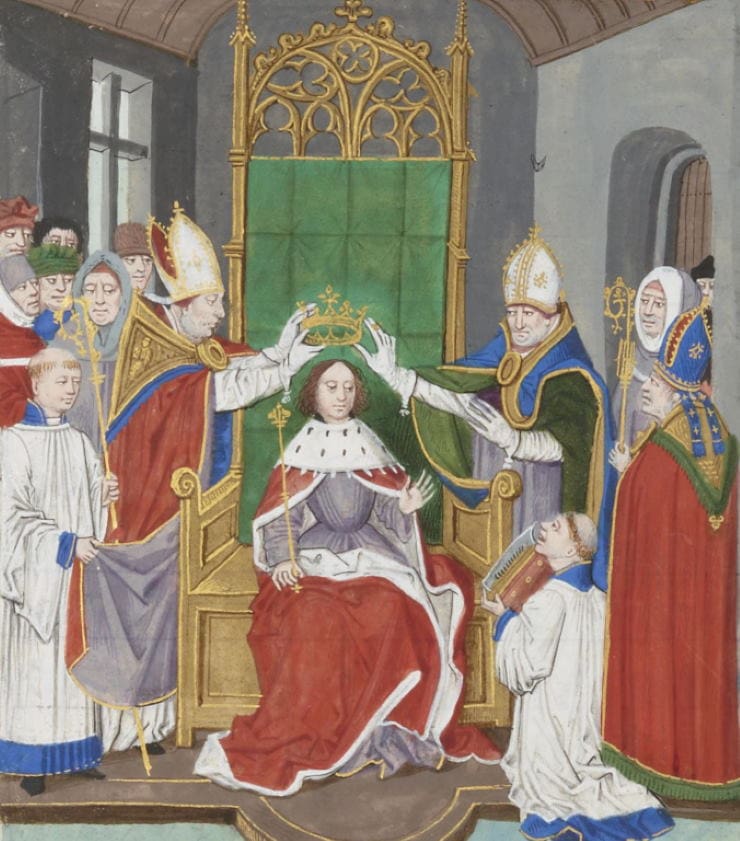
The English army arrayed itself with dismounted infantry in the centre and archers on the wings. The Scottish schiltron’s vied with each other to be the first into combat with the result of disorganising their formations. The battlefield was a valley girded by hills and Scots advance was funnelled into the English centre. Bruce’s men reached the English first and drove them back but they did not break, all the while under a constant and murderous hail of English arrows. Mar’s schiltron crashed into the rear of the first and the battle turned into a confused mele all under the constant hail of arrows. It is likely that more Scots died from being suffocated and trampled by their own men than were slain by the English. The battle turned into a massacre and by sunset both Scottish commanders had been slain. The remaining Scots routed and were pursued by the now mounted English infantry well into the night. Thousands of Scots had died including much of the nobility at the cost of very few English. Balliol, victorious, marched to Perth and had himself crowned King of Scotland at Scone on 24th September 1332. In two public letters Balliol declared that he had reclaimed his kingdom with the help of England and that he acknowledged that Scotland had always been a fief of England. He also promised to hand over border lands, including Berwick upon Tween to Edward III, and that he would serve the English king for the rest of his life.
Sufficed to say Balliol’s declarations incensed the majority of Scots and his reign was immediately challenged by those nobles still loyal to the boy King David II. On the 7th October 1332 David’s supporters recaptured Perth and destroyed its defences. Less than three months after his coronation on 16th December Balliol was ambushed by a force lead by Sir Archibald Douglas (the new Guardian of Scotland following the death of the Earl of Mar), John Randolph, 3rd Earl of Moray, Robert Stewart and Simon Frazer. Known as the Battle of Annan, most of Balliol’s men were killed and Edward himself was put to flight escaping by the skin of his teeth and as legend has it riding, naked to Carlisle. After finding some suitable attire, presumably, Balliol went directly to Edward III to appeal for his help. Edward, keen to gain the initiative in Scotland and demonstrate his increasing power recognised Balliol as the legitimate King of Scotland and dropped any pretence of neutrality. England prepared for war.
Berwick Under Siege
Berwick upon Tweed was the chosen target of the English attack. Edward hoped to capture the town, which was a populous a wealthy port, and considered to be the “gateway to Scotland”. Such was its value that he was sure that it would draw the Scots into a pitched battle to recapture it. His experience of the frustrations of the Weardale Campaign were still fresh in his mind and he wanted to avoid that game of cat and mouse at all costs and defeat the Scots decisively.

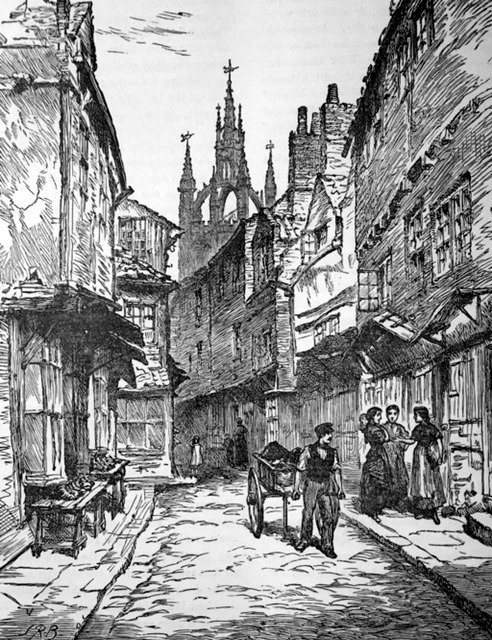
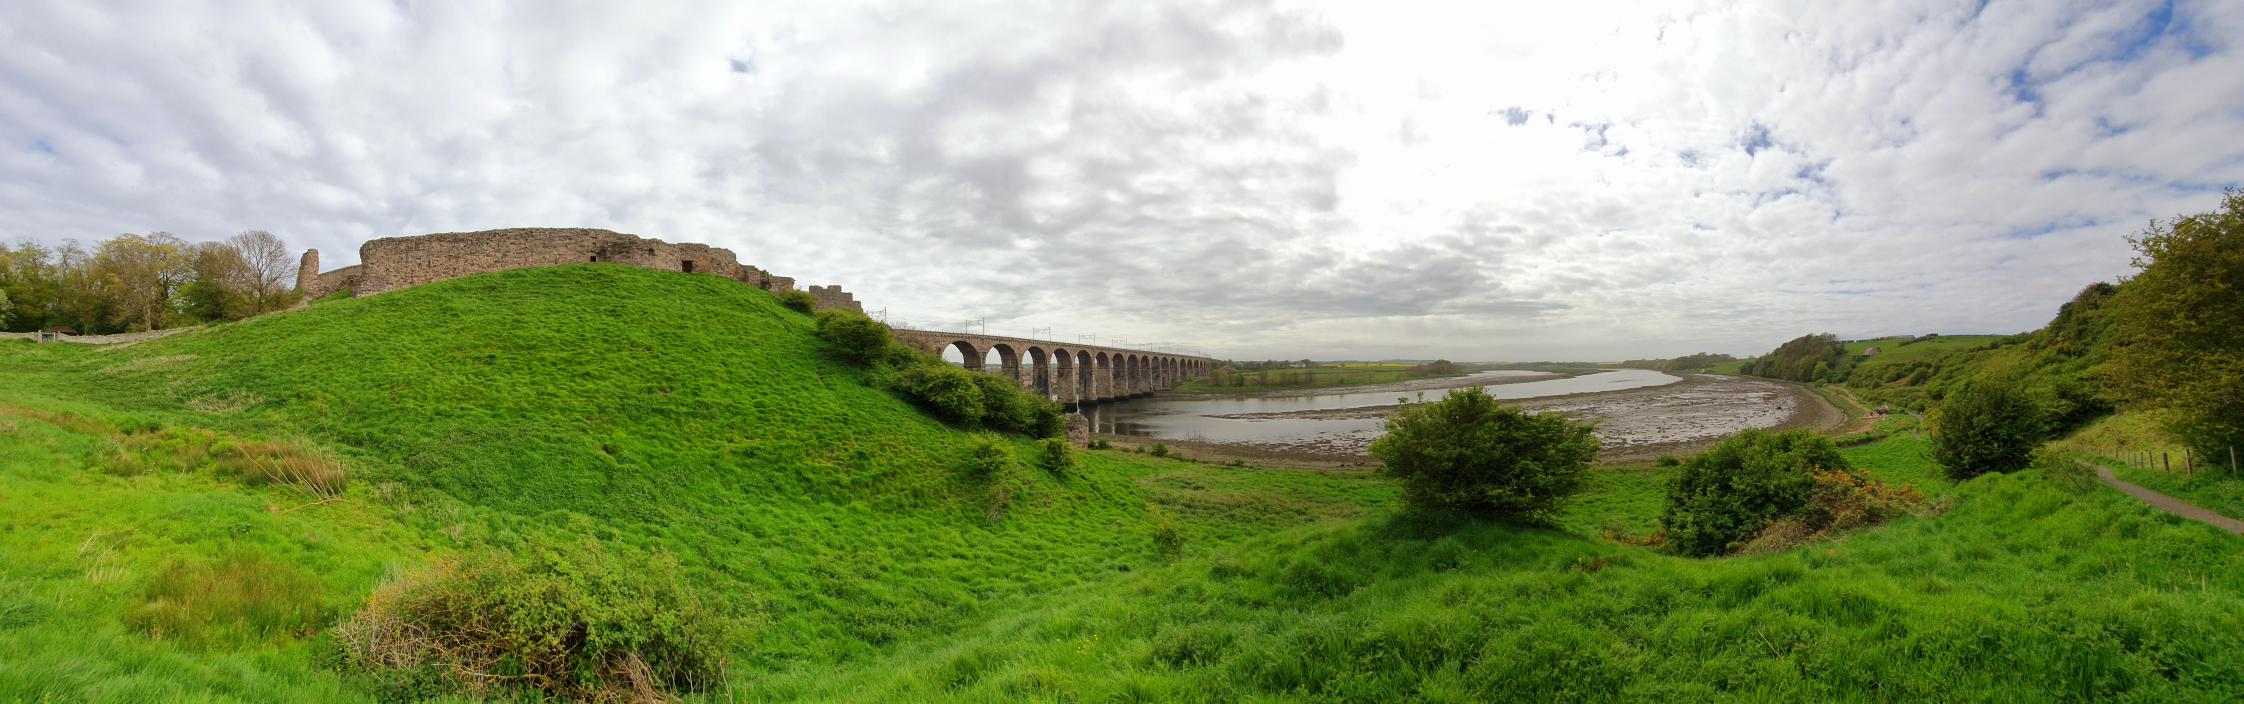
Berwick was a heavily fortified town with encircling walls (not to be confused with the impressive Elizabethan fortifications you can see today), strong towers and gatehouses. Berwick Castle was situated in the north-western corner of the town. Construction of the castle was probably begun by the Scottish King David I early in the 1100’s. It was an impressively strong fortress with walls up to 50 feet high and 12 feet thick. It is sat on a rocky outcrop with steep valleys either side where it commanded approaches from the River Tweed.

Balliol led an expeditionary English force by land and crossed the border on 10th March 1333 arriving at Berwick by the end of that month and laid siege to the town. Edward had blockaded the port by sea and arrived at Berwick with the main English army on 9th May. The surrounding lands were ruthlessly pillaged and all supplies to the town were cut off. The English busied themselves building siege equipment and bombarding the town with two large trebuchets.
At this point it is worth discussing the role of one John Crabbe. Crabbe was a Flemish merchant, pirate and soldier. He had spent much time raiding English shipping and based himself for some time in Aberdeen where he received a warm welcome from the Scots. After achieving considerable notoriety Crabbe eventually came to settle in Berwick where he became a burgess. He went on to play an important role in the defence of the town during the siege on 1318-19, being given credit for designing a weapon to which dropped stones on to the English who were trying to undermine the castle walls. During the Dupplin Moor campaign, Crabbe lead a fleet of Flemish ships, but they were decisively defeated by an English fleet in the Firth of Tay. After that skirmish, Crabbe escaped back to Berwick but was not long after captured by an English soldier called Walter de Manny. Manny received a ransom of some 4,300 marks from the Scots for Crabbe’s release, however, Edward III would have none of that. He was kept in chains until he had made restitution for his earlier piratical activities, and it seems he was coerced into assisting the English at the Siege of Berwick in 1333. The Scot’s, enraged by this apparent betrayal (which is a little unfair to Crabbe since he probably had little choice in the matter), had Crabbe’s son killed and refused to pay any further ransom to get him back. Edward III would co on to pardon Crabbe for his good service during the siege and made him constable of Somerton Castle in Lincolnshire.
The Scots knew of Edwards plans in advance of their invasion and Sir Archibald Douglas had assembled a large Scottish army to face the threat. By the end of June the Scottish garrison of Berwick was close to surrender. The town’s governor, Sir Alexander Seton, requested a truce with Edward on the condition that he would surrender the town if not relieved by 11th July. Edward demanded that hostages were provided to seal the bargain and Seton dutifully offered his son Thomas along with 11 others.
Weighing up the considerable risks he was contending with Douglas crossed the border on the day that the truce was due to expire. With an army numbering as many as 15,000 men (contemporary chronicles have numbers up to 100,000) he advanced to Tweedmouth, which the English were using as their supply port, and burnt it to the ground in sight of the English army. The English did not rise to this antagonization and held firm in their entrenchments. On 12th of July a small force of around 200 Scottish cavalry, commanded by Sir William Keith, headed towards Berwick, and with much difficulty made it into the besieged town. Keith then took on the Seton’s role as governor. Douglas claimed that, because of this, the town had been relieved, and that Edward should depart threatening to invade England if he did not. Edward ignored this threat and considered that the town had not been relieved and therefore the truce had been broken. Despite the entreaties of his wife, Seton and Keith did not surrender and Edward, henceforth, erected a gallows outside the town walls at Tweedmouth (at a spot still known as a “Hangie Dyke Neuk”) and executed Seton’s son Thomas in front of his parents.
“The trumpets sounded out oure the Tweed
Wi’ a blast o’ deadly sound;
Auld Seaton and wife gaed up on the wa’s,
For theyre sonnes to death were bound.”
Extract from the Ballad of Seton’s Sons, or the Beleaguering of Berwicke, from Sheldon’s Minstrelsy of the English Border
A proclamation was made that for every day that the town did not surrender a further two hostages would be hanged.
Following the execution of Thomas Seton, a new truce was agreed on the condition that if the garrison was not relieved by 19th July the town would be surrendered and all inhabitants would be granted safe passage. This time, what constituted relief of the town was very clearly defined; either the entrance of 200 or more Scottish men-at-arms into the town, the Scottish army forcing its way across a specific stretch of the River Tweed or a defeat of the English army in open battle.

On his way north to Scotland Edward had bought his wife, Queen Phillippa with him as far as Bamburgh Castle, where she stayed. Seeing the opportunity to draw Edward away Douglas marched his army south into Northumberland to attack the queen. This ruse had been used before. In 1319, when Edward’s father, Edward II had laid siege to Berwick the Scots had marched south to York where Edward’s mother had been ensconced. Back then it had resulted in the desired effect and Edward II had lifted the siege to go ensure his wife’s safety (I’m not sure if he regretted that later in life!). This time, however, Edward III did not take the bait. Bamburgh was a strong fortress and Edward knew that Douglas did not have the time or resources to storm it. Douglas laid waste to the surrounding land but still Edward remained steadfastly at Berwick. All of his subterfuges exhausted Douglas felt his only option was to fight Edward in battle.
The Battle of Halidon Hill
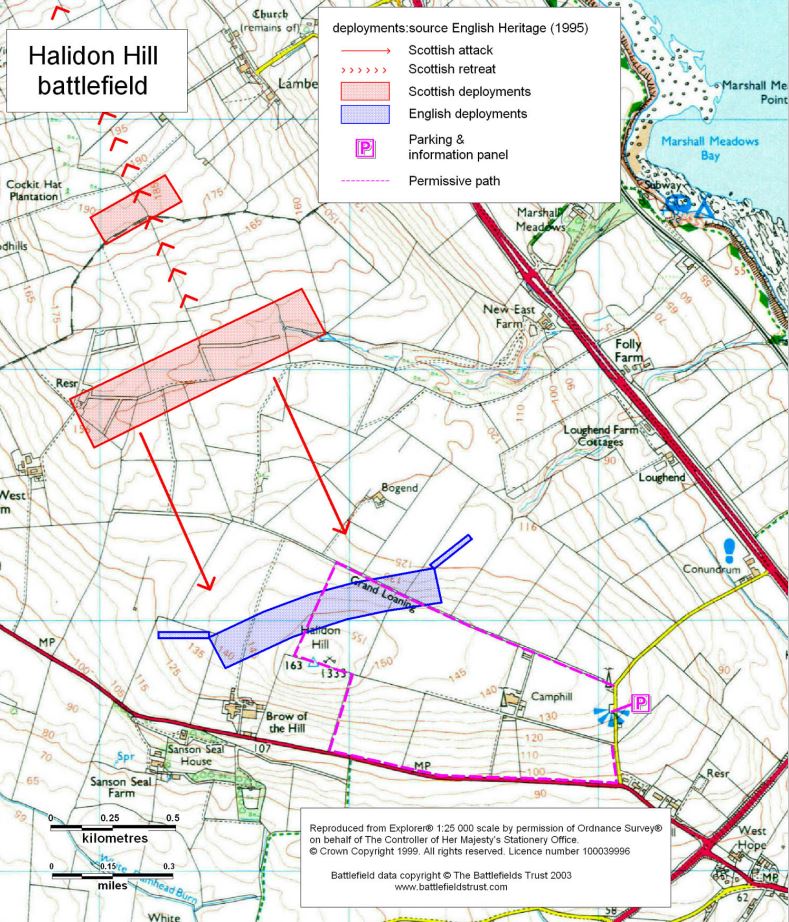
Edward manoeuvred the bulk of his army of some 10,000 men to Halidon Hill, around 2 miles from Berwick, leaving around 700 men to guard the siege perimeter and prevent a sally from the town. Halidon Hill was a strong position and offered a superb vantage of the surrounding land. The Scottish army marched back north from Northumberland, reaching the town of Duns (approximately 12 miles to the west of Berwick) on 19th July. The following day they advanced on the English position from the northwest. This put the English army between the Scots to the north and the River Tweed to the south. An English defeat would have been disastrous with no easy route of retreat, and Edward knew it. He turned his army to face the Scottish advance and formed up in to three blocks of infantry or “battles”, covering a wide arc. The now feared longbowmen were positioned on the wings of the infantry. The Scots halted on a nearby hill to the northwest and formed a defensive position. A lower lying boggy area separated the two hosts. The Scots expected the English to attack, but they held firm. The armies were close enough to trade insults and at one point the Scots challenged the English to send forth their champion to engage in single combat. Robert Benhale of Norfolk dutifully accepted the challenge and fought a Scottish champion called Turnbull and his dog. Benhale killed them both.

The stalemate continued with neither side engaging even though the Scots had numerical superiority. Perhaps they were waiting for high tide in the Tweed to ensure that retreat for the English would be near impossible. However, Douglas knew that delay or retreat from battle would ensure that fall of Berwick and ultimately, he was compelled to make the first move. The Scots needed to advance down hill and across a boggy low lying area before they could climb the slope up to the waiting English. A little afternoon horn and war pipes sounded, and the Scots charged. Remembering the murderous effect of the English longbow at Dupplin Moor the Scots tried to counter the barrage by running as fast as they could through the “kill zone”. Hampered by boggy ground, the arrows fell on the tightly packed Scottish schiltrons “as thick as motes in a sun beam”, according to an unnamed chronicler. The Scots were exhausted by the previous days march and the rapid advance and intense arrow storm coupled with the strength of the English position took out most of the impetuous from the Scottish charge. The schiltron under the command of the Earl of Mar engaged with Balliol’s battle first, who held their ground. A second schiltron engaged with the King’s battle in the centre. The third schiltron clashed with the battle commanded by Henry Beaumont. Furious close combat ensued all the while the English archers continued to pour arrows into the flanks and midst of the Scottish formations. The fighting did not last long and the Scots fighting Balliol broke first. As with an infectious disease the panic spread and before long the Scottish army was in full route.
Edward was not in a merciful mood and the English pursued the broken Scots for 8 miles. Few prisoners were taken and around 100 of those who were taken captive were beheaded the next day on 20th July. This was the day of the expiration of the revised truce and the garrison at Berwick, having borne witness to the battle, duly surrendered the town.
Modern estimates put the Scottish death toll at c.3,000. As ever the contemporary accounts vary wildly. However, by any measure, English deaths were comparatively very few, perhaps less than 20. Edward got the decisive battlefield victory he had wanted.
Balliol was restored to the throne of Scotland and dutifully began redistributing the lands to the disinherited lords who had helped him. Unfortunately, this dispossessed a new generation of nobles, the sons of those who had fallen in battle, and they were set on continuing the cause of Scottish Independence in the name of David II.
Visiting the Battlefield Today

A walking route around the battlefield is accessed just off the A6105 (Duns Road). Post Code TD15 1UD takes you to a small car park and there are information boards which show you the routes of the walk. On a good day you will be provided with some breath taking views of the border country and will fully appreciate Edward III’s reasoning for choosing this site to give battle. A concrete triangulation point, and wooden bench mark the summit of Halidon Hill.
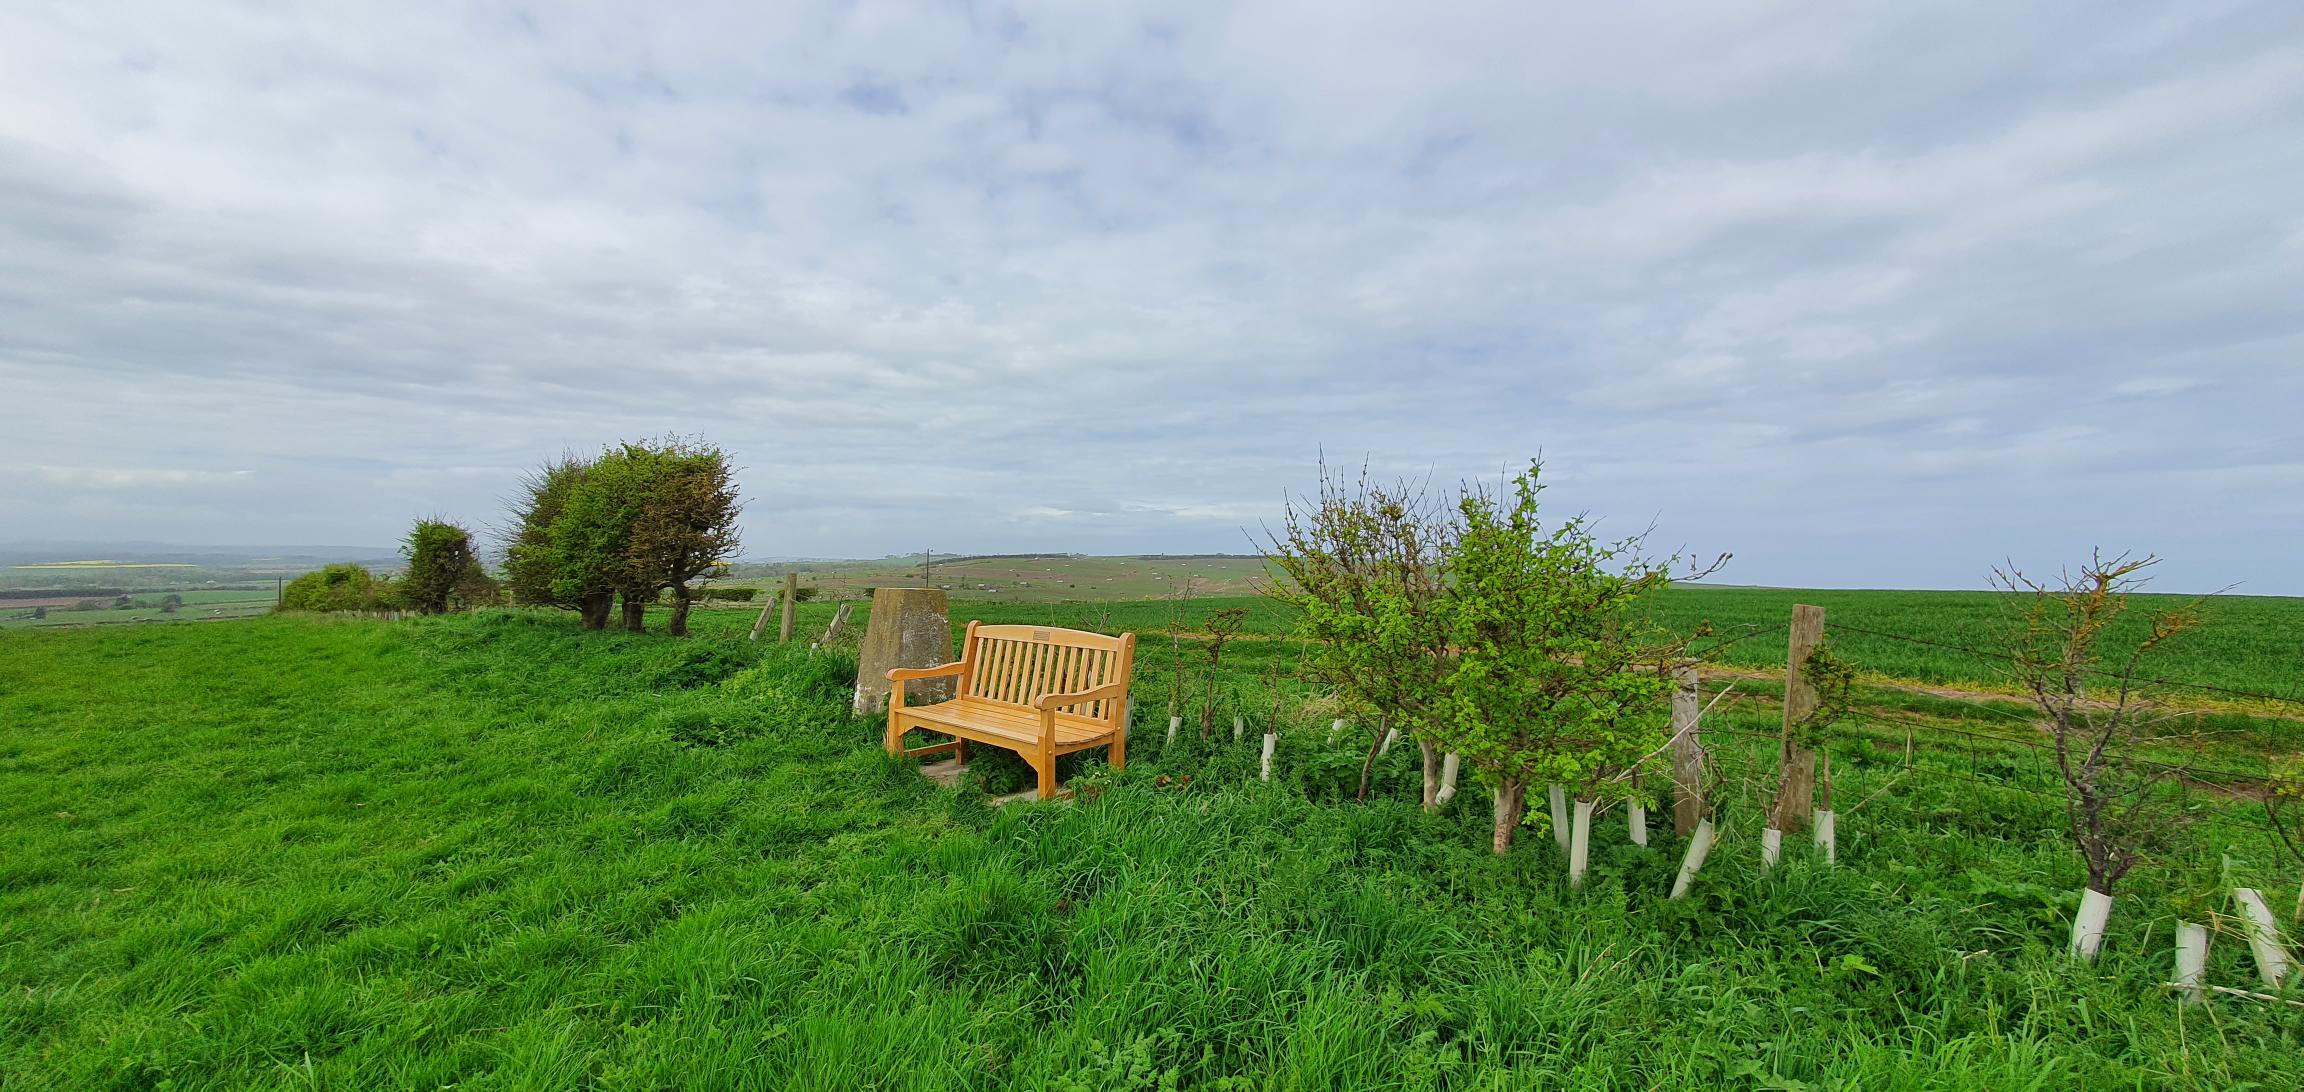
The landscape has changed following the Enclosure Act of the mid-19th Century, but I think you still get a sense from the lay of the land and with a little imagination you can certainly feel closer to the events of 1333.

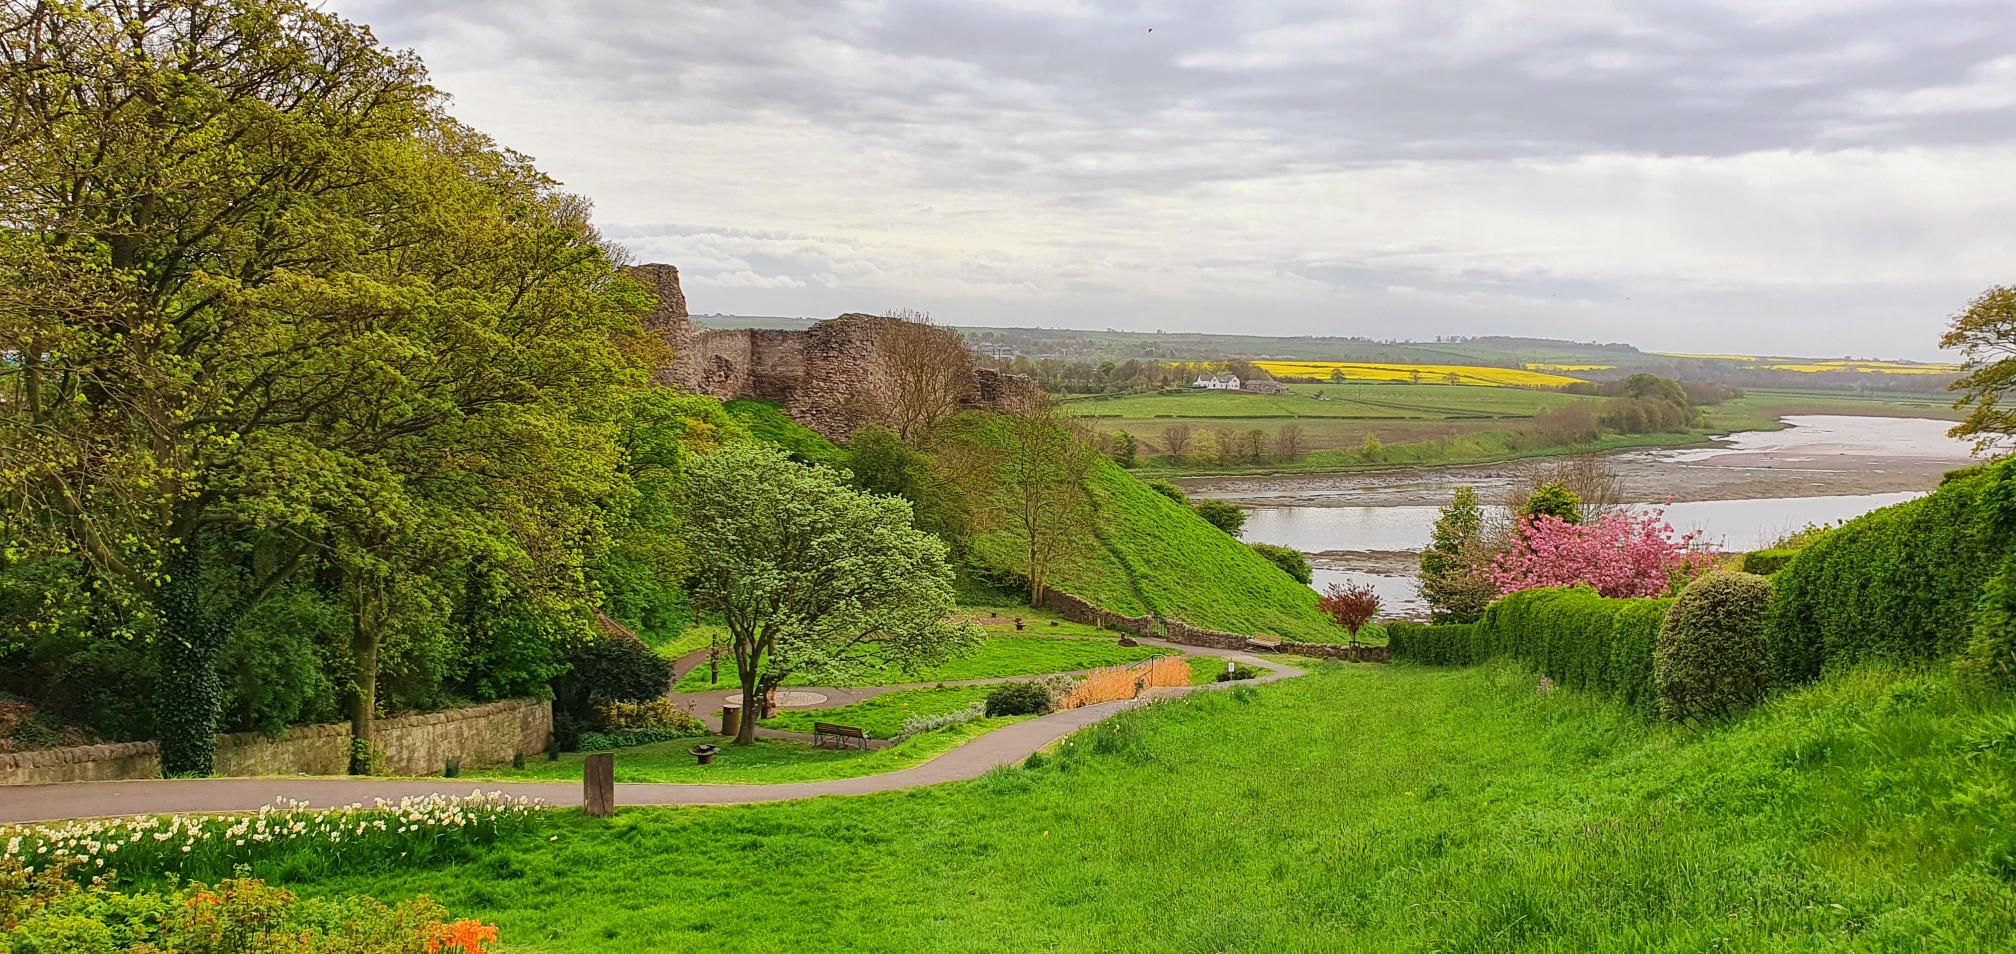
The medieval defences of Berwick are largely lost and, in the name of Victorian progress, unfortunately much of what remained of Berwick Castle was demolished in the mid-19th Century to make way for Berwick railway station and the now iconic Royal Border Bridge. Remains of the eastern ramparts and the White Wall can be seen in some splendour from Coronation Park. It’s worth a walk through the park and down to the banks of the Tweed where you can inspect the ruins and marvel at what must have been an impressive fortress in 1333.


Sources and Further Reading
In writing this blog I have read older and more modern accounts / interpretations of the events as well as referring to some of the source material. The books I would recommend are:
- Scalachronica 1272 – 1363, Sir Thomas Gray (Edited and translated by Andy King)
- Border Battles and Battlefields, James Robson (1897).
- Borderland Castles and Peles, Robert Hugil.
- Border Fury – England and Scotland at War 1296 – 1568, John Sadler (2005).
- English Heritage Battlefield Report: Halidon Hill 1333 (1995).
- War Cruel and Sharp – English Strategy under Edward III 1327 – 1360, Clifford J. Rogers (2000).
- Kings in the North – The House of Percy in British History, Alexander Rose (2002).